Educational

THINK TWICE BEFORE YOU BELT UP!

weightbelt no good personal trainer rehab trainer.jpg

More often than not I see loads of guys and girls donning the weight belt during lifting sessions, regardless of whether it is a heavy strength session or a metcon that is being carried out.  

When did the weight belt trend begin and what knowledge have we gained since then?  

Do you even know WHY you are wearing a belt if you are someone who puts one on habitually before each session?  

I have tried to breakdown an article by Paul Chek on the subject to highlight the most important points made.  I strongly advise anyone with an interest in prolonging their low back health or anyone currently using weight belts regularly to read the full article here.

Weight belts have been known to be used as far back as the early 1900's, with no clear reasoning behind the reason for their use.  It may have been in line with medical trends back then to use corsets as a treatment for scoliosis and back pain?

These days there has been much research into the area of lower back stabilisation and low back pain resulting in a much more in depth understanding of the stabilising system of the spine.

Cue The Inner Unit & The Outer Unit…

The Inner Unit consists of A)  Transversus Abdominis  (TVA) & posterior fibres of Obliquus Internus, B) Diaphragm, C) Deep Multifidus, D)  Pelvic Floor Musculature.

The Inner Unit consists of A)  Transversus Abdominis  (TVA) & posterior fibres of Obliquus Internus, B) Diaphragm, C) Deep Multifidus, D)  Pelvic Floor Musculature.

These muscles play a vital role in lower back stabilisation!  A study carried out in 1999 concluded that in people without back pain, the TVA fired 30 milliseconds (ms) prior to shoulder movements and 110 ms prior to leg movements.  During each variation of movements performed within the study there was still synergistic (muscles working together to perform a movement) recruitment of all inner unit muscles.  It was noted that regardless of movement plane or pattern of the subjects, the TVA muscle appeared relatively consistent in its activation pattern.  Researchers propose that the nondirectional, specific activation of the TVA relates to the dominant role played in providing spinal stiffness.

 "The TVA, in concert with other inner unit muscles (Figure 1), activates to increase stiffness of spinal joints and the sacroiliac joints (6,7,15). Activation of the inner unit provides the necessary stiffness to give the arms and legs a working foundation from which to operate. Failure of the TVA to activate 30-110 ms prior to arm or leg movements respectively has been correlated with back pain and dysfunction (6, 16). The inner unit is part of a system of stabiliser mechanisms, all of which are dependent on the integrated function of all inner unit muscles." - Paul Chek

Couldn't have said it better myself!  

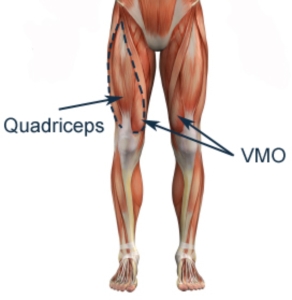
The Outer Unit consists of many muscles such as the External Obliques, Internal Obliques, Erector Spinae, Latissimus Dorsi, Gluteus Maximus, Adductors and Hamstrings working together with the inner unit to achieve co-ordinated movement.

Here is a simplified version of the inner/outer unit systems.  Using a pirate ship’s mast as a human spinal column. While the inner unit muscles are responsible for developing and maintaining segmental stiffness, the bigger muscles, shown here as guy wires, are responsible for creating movement.

The Inner and Outer Units Simplified

The outer unit muscles of the trunk demonstrated here are (A) rectus abdominis, (B) internal and external oblique, (C) erector spinae; the outer unit actually contains other muscles, which have been excluded for simplification. The inner unit, which…

The outer unit muscles of the trunk demonstrated here are (A) rectus abdominis, (B) internal and external oblique, (C) erector spinae; the outer unit actually contains other muscles, which have been excluded for simplification. The inner unit, which contains all the muscles demonstrated in Figure 2. is demonstrated here as (D); the multifidus acting as segmental stabilizers for the purpose of controlling joint stiffness. To tighten the guy wires (A-C), which provide gross stabilization of the ship’s mast without synergistic tightening of the segmental stabilizers (D) would obviously result in increased potential to buckle the mast. The mast represents your spine!

"Recruitment of trunk stabilizers via EMG with and without a weight belt has been studied. These studies concluded there was increased recruitment of the erector spinae and rectus abdominis when wearing a belt. Now that you understand the workings of the inner unit, it should be evident that by recruiting the larger, gross stabilizers without proportionate recruitment of the inner unit musculature responsible for regulating joint stiffness, the result could certainly lead to spinal joint dysfunction or exacerbate an existing condition. It is also likely that prolonged use of weight belts will result in coordination problems within the inner unit muscles and among the inner and outer unit systems." - Paul Chek.

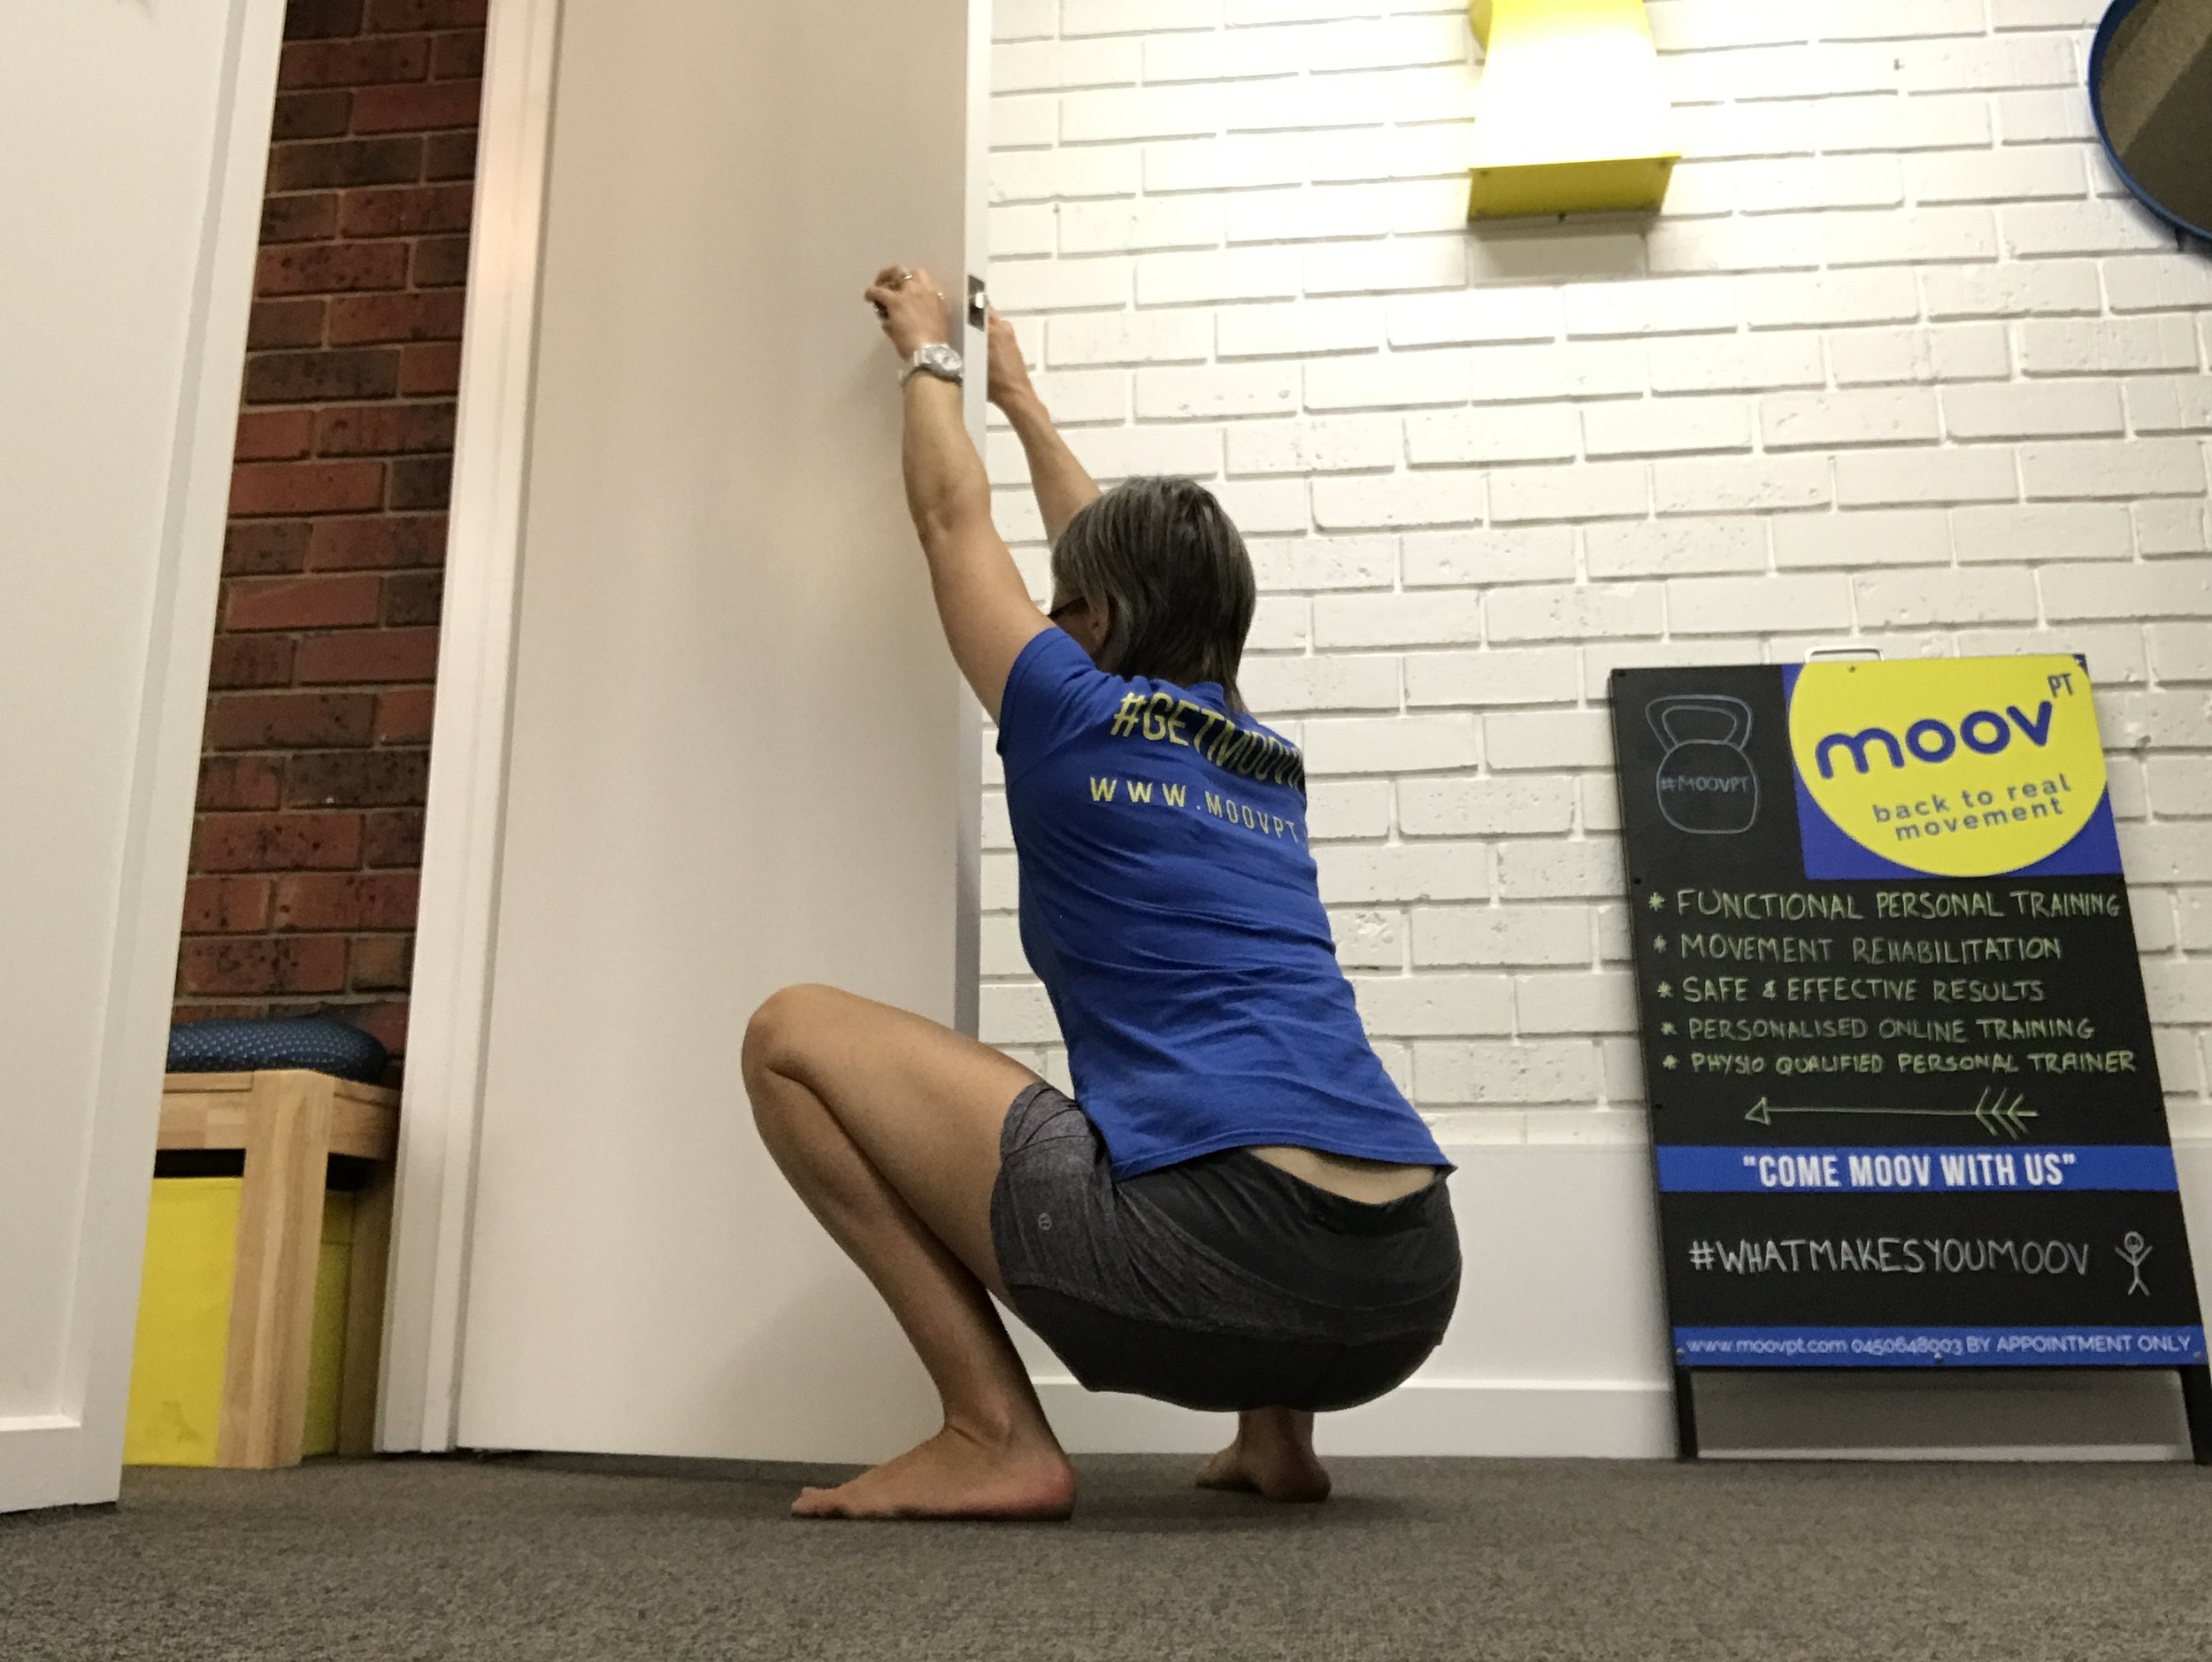
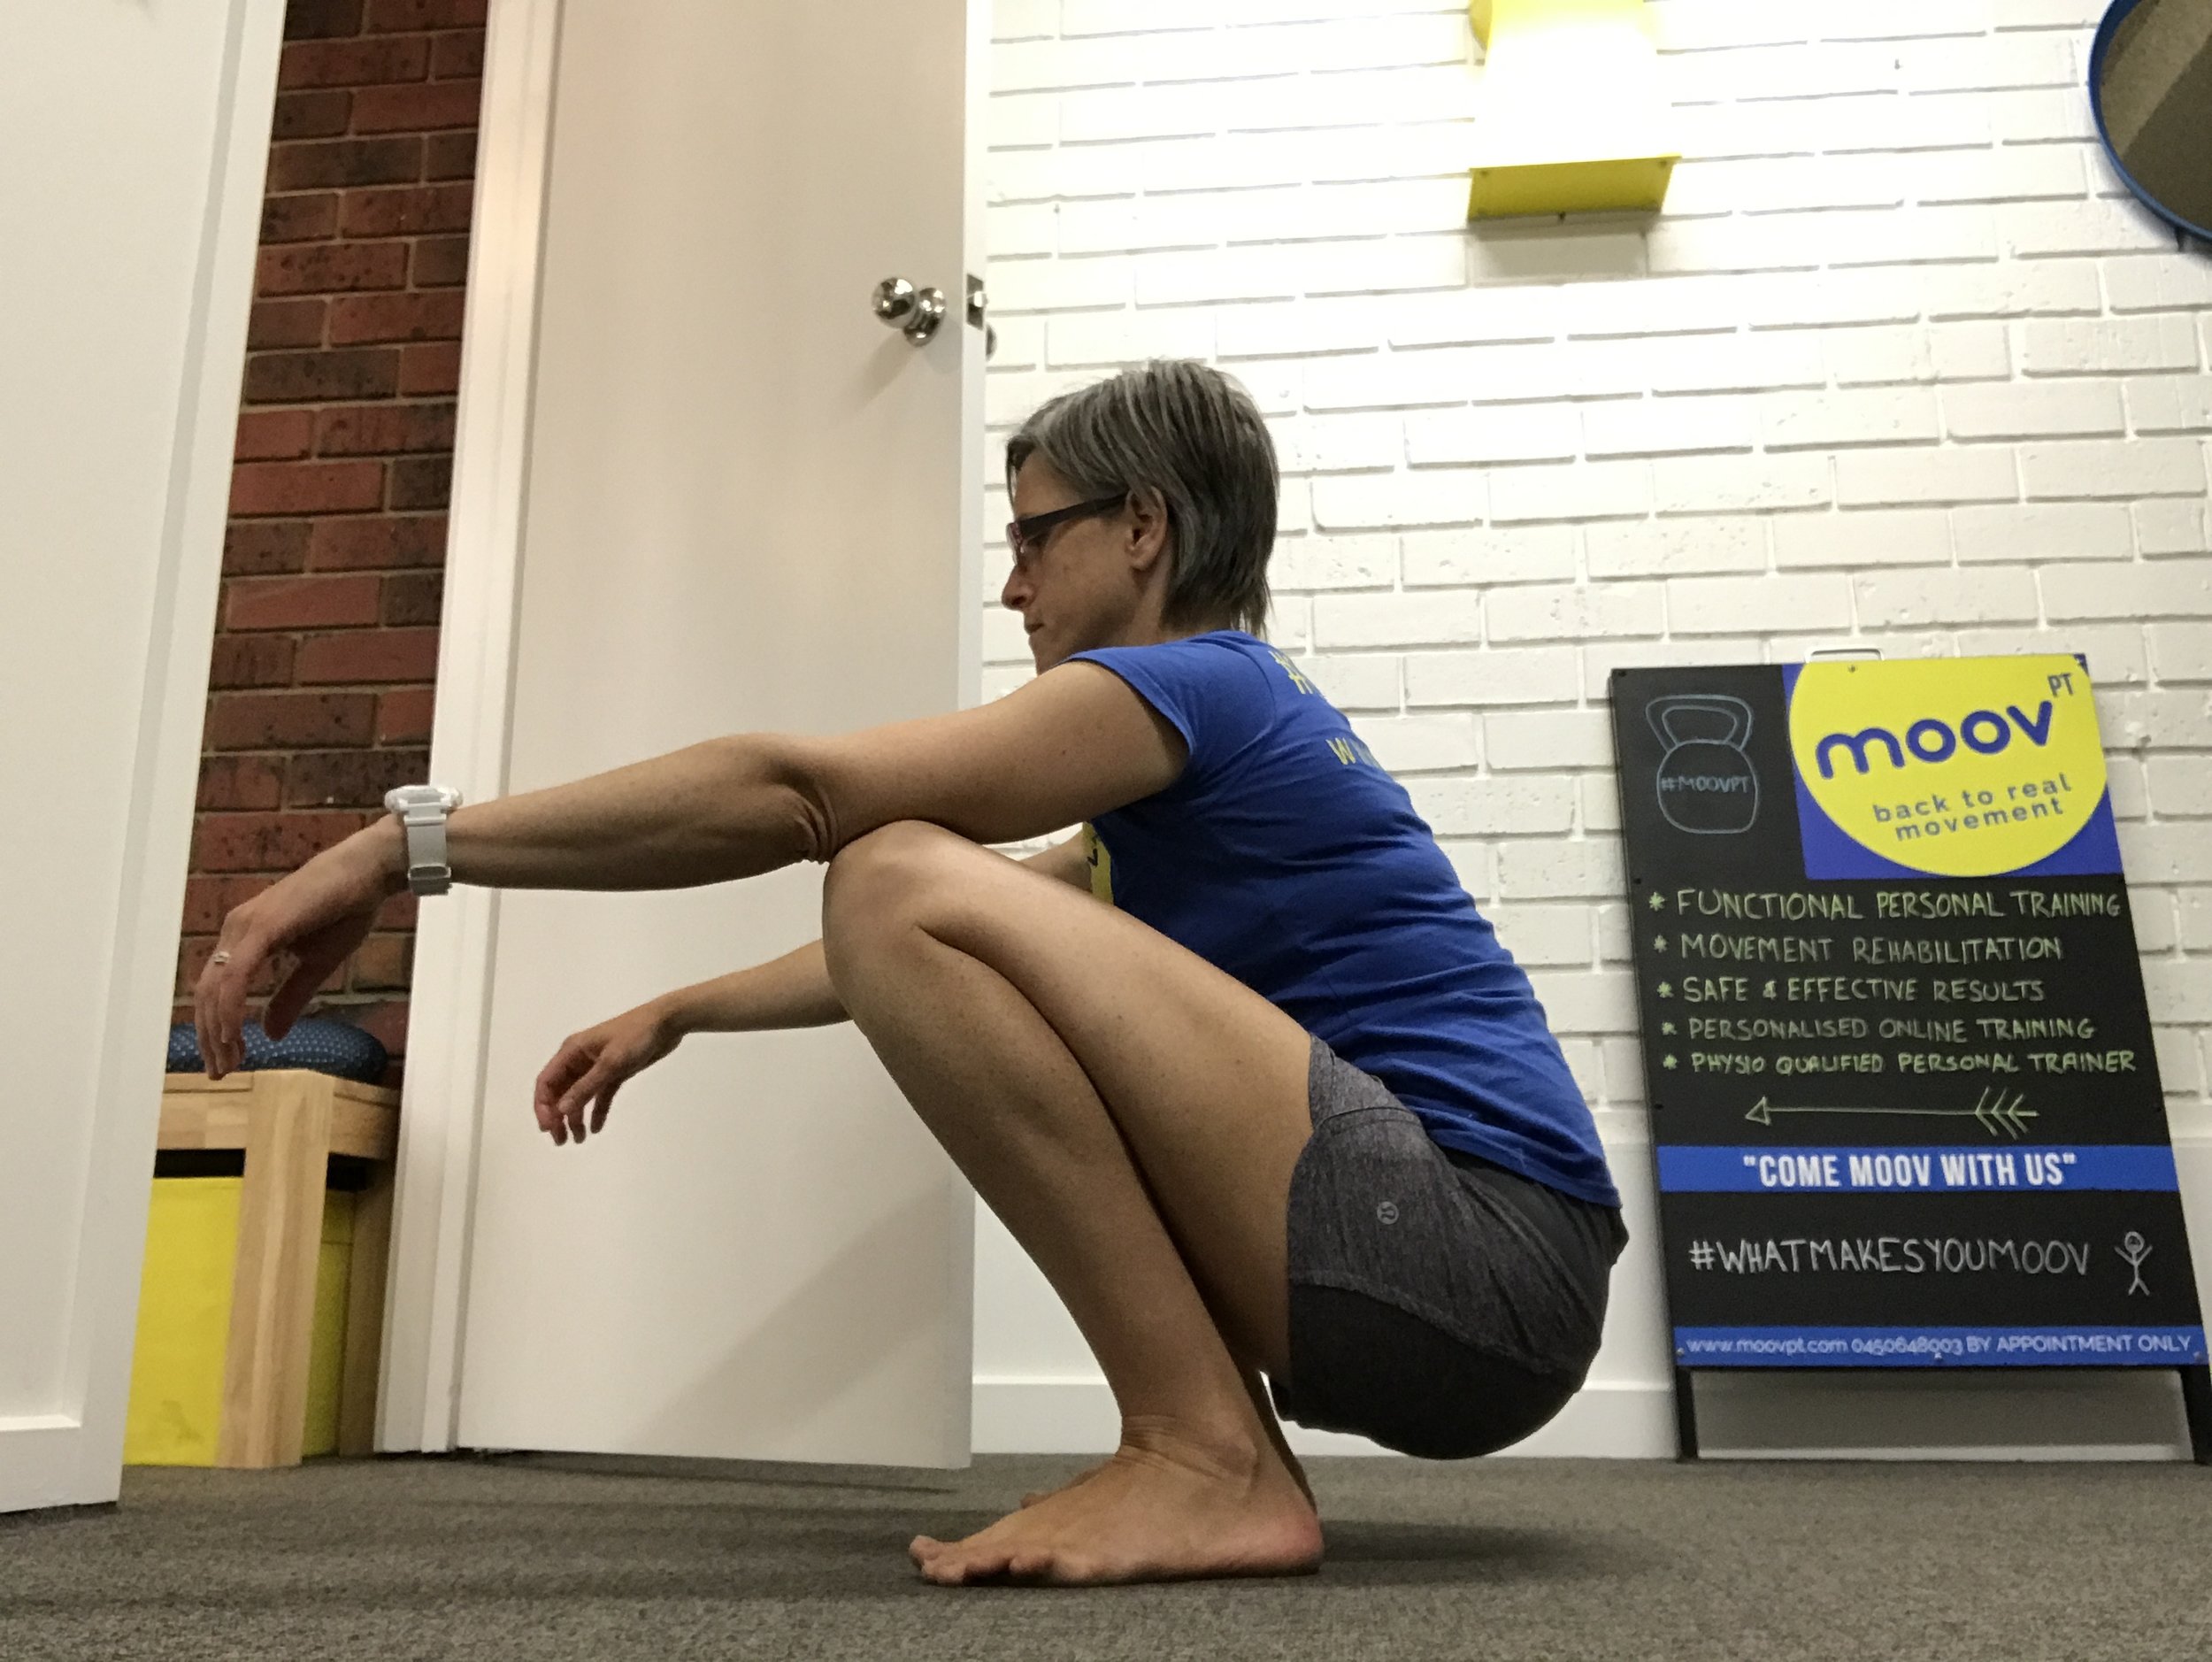
Now, all this said, if you are someone who regularly relies on a weight belt and this article opens up your eyes into entering the world of being Back Strong & Beltless.  Please refer to Part 3 of the article where Paul will talk you through the safe and necessary steps to take in order to wean yourself off the belt.  Your current movement patterns will be reliant on your weight belt and getting rid of the belt all of a sudden will no doubt result in injury.  Wean yourself off slowly and carefully and get your internal weight belt working for you instead!  Just as nature intended!  :-)

All references can be found on Paul Chek's full article.

REGRESS TO PROGRESS

progress personal trainer rehab trainer.jpeg

To quote Pat Flynn from Chronicles of Strength (love this simple, yet effective way of summing up this whole blog post in 3 small symbols)...

"- = +" :-)

The golden rule in movement:  REGRESS TO PROGRESS!...

For the trainers out there:  please don’t expect your client to “get” movement by handing them a weight they’re not ready for and just expecting them to move correctly by shouting out a few cues to them…it ain’t gonna happen!  

The only thing that happens is they learn bad movement and possibly land up with an injury.  

For the fitness enthusiasts out there: you have to break down movement and work on the weaknesses within a movement pattern in order to progress a movement. Don't just think that practising single leg squats or pistols is going to get you better at doing pistols...it's only gonna get you injured.  There is a reason why you struggle with certain movements, you need to find that reason and work on it!  Maybe your ankles aren't mobile enough; maybe your hips are unstable; maybe you lack good sequencing in your inner unit (core); maybe you have flexility issues in either certain muscles or joints; maybe fear is holding you back; maybe all of the above! :-o  There are a number of possible, likely reasons but you need to find yours.

Just because your mate did loads of hamstring flexibility and went from finding pistols difficult to being able to achieve them, doesn't mean that's going to work for you.  We're all individuals here and you need to treat yourself as one.  And holding a kettlebell out in front of you is not the answer, yeah, you might feel more stable but maybe, just maybe that is because you have core issues and the kettlebell is forcing your body to react to the weight by engaging your core before you descend, but what happens when you try again without the kettlebell?  

I'd suggest ditching the kettlebell and stepping away from the pistol for a while to work on core sequencing...once you've made progression there, find ways to progress.  I'm just using pistols as an example, this applies to anything in life.  And it takes time, you're not gonna fix things overnight.

So please, think before you cause yourself harm.  If I gave you one Golden Rule of advice it would be CHECK YOUR BREATHING!  This is highly important for any form of stability work.  If your'e unsure, my stability exercise page has a great description of how to check your breathing and how to correct it, I have video links on Youtube to help as well & my facebook page has a link to an awesome interview with Dr Perry Nickleston & Julie Wiebe on the pelvic floor & breathing...Check it out!  Core function begins with breathing!

I repeat:  Regress to progress…Perfection before load…Get assessed if you're unsure...

PREVIOUS INJURY IS A BIG PLAYER IN THE MOVEMENT GAME!

quads vmo personal trainer adelaide gold coast.jpg

One of my clients, who is a keen diver, tells me whenever he swims or dives he usually always gets pretty bad cramping in his right hamstring towards the end of the swim/dive and wandered if there was anything he could do for it.

After a couple of minutes of assessment I had discovered he had a hamstring to quad dysfunction & his hamstrings were compensating for his medial quadricep (Vastus Medialis) predominantly. His VMO muscle (Oblique fibres of the Vastus Medialis that form the teardrop muscle at the knee) was particularly weak and had some noticeable wasting. His quadriceps in general on the Right side were slightly wasted in comparison to the Left.

He then precedes to tell me when he was 15 years old (+-50 years ago) he tore his medial quad & never got treatment on it, there was a noticeable dip in the muscle bulk as well which had been there ever since (a give away for a full tear or a possible partial tear). EUREKA!  

So our findings related back to an ancient injury from decades ago that has manifested as dysfunction in his right side and causing him problems at this time.  He admitted never having issues after the injury healed and kept playing footy for years.

Moral of the story, even though his injury was decades old and he'd adapted to it in a way that enabled him to get away without too much trouble for many years, it eventually comes back to bite you in the ass!  Some cases being worse than others but don't ride on dysfunction for too long as it will always win!  Post injury compensations stay with you for life, unless of course, you seek help to change them!

MOVEMENT...WHAT IT REALLY MEANS!

American Turner Gymnasium 1860

American Turner Gymnasium 1860

An online lecture I saw recently given by Dr Ed Thomas, an expert in the foundation of Physical Education, drove me to analyse what fitness is today in comparison to what it was historically.  Historically, there are three fundamentals of movement and fitness, these are Progression, Variety & Precision.  

Now from what I can tell and have observed over the years is that the majority of fitness enthusiasts seem to do well to take care of the Variety aspect of fitness, it's not hard to keep workouts varied.  Progression seems to be mostly adhered to, it's quite simple, you learn a movement to a satisfactory level until it becomes quite comfortable and then you progress that movement, either by adding weight, increasing reps or challenging the movement to a higher level of difficulty (i.e. advancing from a squat to a single leg squat progression).  Now, I have to take a pause here, although progression seems to be quite evident in most fitness programmes, there is a little issue that is quite niggling…this would be the over-eagerness to progress.  This is a huge issue that is present within our field, you may have someone who is recently able to squat their own bodyweight comfortably but then wants to throw 40kgs onto their back and continue to squat, or a personal trainer who wants to make a client sweat more by handing them heavier weights resulting in a less precise movement pattern.  You can't expect the body to move as efficiently with extra load in a movement pattern that is newly learned with only bodyweight or that is challenging enough with the current weight used.  This brings me to the third and final (and I personally believe the most important) fundamental...Precision.

We need to find a way back to basics and get the population moving well and precisely again, we are so far away from our own mind-body connection that most people just go through the motions of exercise without ever making a conscious connection to how they are moving, why they are moving or how they are breathing.  There was no sloppiness in movement back in the 1800's & most of the 1900's, precision was the key focus and the fitness just followed.

functional movement personal trainer gold coast.jpg

In Gray Cook's book, "Movement", he talks about the origins of Martial Arts and sums up what fitness should and used to be.  Somehow recent generations have managed to distort this approach and turn it on it's back.  Current jobs and lifestyles have a huge role to play and make it hard for the body to hold onto fundamental physical fitness, but not impossible by far!  "Purposeful movement perfection was the focus, and physical conditioning happened as a natural side effect".

primal movement personal trainer.jpg

Modern day gyms are stacked full of equipment promoting dysfunctional movement.  The use of fixed machines encourage your body not to utilise it's core stabilising musculature and instead, rely on your large, global muscles for movement.  In our daily lives we need to be able to squat, lunge, push, pull, reach, run, bend and rotate, all done whilst fighting gravity (not sitting locked into a machine).  This is when our bodies are moving as intended.  These are the movements we need to perfect and do with precision in order to be healthy, fit individuals avoiding injury.

Look at gyms from ancient times and see if you can spot a hamstring curl, a pec deck or a leg extension machine anywhere?  They only use anti-gravity equipment in the form of ropes, rings, parallel bars, ladders etc and hand weights in the shape of dumbbells, kettle bells, medicine balls and clubs.

Train functional movement patterns and make sure you do it with Precision, Variety & Progression in order to achieve true fitness.  Don't rush into a new movement before you have perfected its predecessor and don't load up a movement pattern before being comfortable and strong enough in doing it body weighted first.

DYNAMIC DEEP SQUAT

Following on from our previous post. Here is an example of how you can improve your deep squat by making it more dynamic (adding movement). Try these movements out for up to 30 seconds per movement. 

~ Rocking forwards and backwards.

~ Rocking side to side.

~Rotating one way and then the other.

Slowly you will feel your joints and muscles loosen up and feel more comfortable in the bottom of the squat.

HOW TO WORK TOWARDS THE DEEP SQUAT

We all could squat at some stage of our lives. Over time, unfortunately, some of us have lost the ability to get down into a relaxing deep squat. Whether this is due to injury; poor movement habits or sedentary lifestyles.

All is not lost though. It is still possible to train your body to be able to squat again. 

There are many benefits to enabling your deep squat!

Improved hip & ankle mobility / Improved lower back flexibility / Improved abdominal stability.

There are also some common reasons why a deep squat may currently be out of reach:

Tight calves / stiff or immobile ankle joints / stiff hip joints / tight hip musculature / stiff, immobile spinal joints / weak, dysfunctional abs.

There are ways to work around these issues to help you gain your squat back!

When you're able to squat effectively, it crosses over into your daily life and helps you to avoid moving in awkward ways which can avoid a number of potential injuries that otherwise may have occurred. 

Practising the deep squat:

Starting Point Option One With Heel Raise

Starting Point Option One With Heel Raise

Starting Point Option One Without Heel Raise

Starting Point Option One Without Heel Raise

Starting Point Option Two

Starting Point Option Two

Option One:

Using a door handle for support and heel raises (door stoppers from Bunnings) if ankle mobility is an issue.

Holding onto the door, slowly lower into a squat to a depth that feels manageable. Hold for up to one minute. Start slow, if a 10 second hold is all you can manage, that's ok.


As above, but if it is comfortable enough to do without needing a heel raise assist then use this version.


Option Two:

Using a doorway for support and heel raises (door stoppers from Bunnings) if ankle mobility is an issue.

Holding onto the doorway, slowly lower into a squat to a depth that feels manageable. Hold for up to one minute. Start slow, if a 10 second hold is all you can manage, that's ok.

Half deep squat on doorway regression.jpg

Alternative Depth:

If lowering deep into the squat isn't comfortable at first, then start at a depth that is. 

Take your time with this, slowly build up the amount of time you spend in the squat and then work on the depth. If you're using heel raises then aim to try and slowly wean off them (by having your feet further forward on the raise until you no longer need it) as it gets more comfortable. 

Once you have spent time (and it may take a lot of time, even a year or so) on your deep squat and feel comfortable enough to try without any assistance, start working on an unassisted deep squat.

Last Progression To Full Unassisted Deep Squat

Last Progression To Full Unassisted Deep Squat

This is the final destination of the deep squat journey! This is where you want to try and aim for eventually and then work up time spent in this position.

Once comfortable to do this you can gently rock side to side and forwards and backwards as well as gently twisting either side to try and create more movement through the ankles and hips in this position. Click here for a video demo.

Start your deep squat journey now! I would love to know how you go so feel free to post a pic of where you're at with the squat on our facebook page!

NO. 4 AND FINAL OF OUR TOP 4 AB EXERCISES: FITBALL OR TRX JACKNIFE AND/OR PIKE

Jackknife and Pike on a fitball or TRX. A great ab and core exercise for hitting the abs hard!

Want to train your ABS in an efficient, functional way?

As mentioned in the previous Sit-up posts, you all know (unlike most personal trainers), I am no fan of traditional sit-ups. So here is the fourth and final of 4 alternatives that will hit your abs hard and give you that burn that you probably desire. As well as increase the function of your core area if done correctly.

No. 4 in our Top 4 ab exercises

4. TRX or Fitball Jackknife/Pike:
This is really two in one as the pike is a good progression from the Jackknife! 

Using either a fitball or a TRX for the Jackknife.
Hands on floor in a pushup position with shins and ankles on fitball (or feet into TRX straps). Push your hands away from the floor to activate your shoulders, gently push your ankles into the ball and drive your knees towards your elbows. Make sure you brace your core and don't let your pelvis sag down or raise up too much. Keep your shoulders stable so there is no movement through them.

The pike is very similar but instead of bending the knees, keep them straight, push your feet into the fitball or straps and reach your butt towards the ceiling, whilst still pushing your hands away from the ground. Keep your neck neutral, I could probably have tucked my chin in a little bit more in this video. 
Only lift your hips as high as is comfortable. Mine go pretty high but start by getting used to the movement first and making sure you’re moving through your hips and not your lower back.

These are both quite advanced moves so please only attempt if you have relatively good stability and strength.

Otherwise, give it a go! :-)


LEARN HOW TO TRAIN SMART!

JOIN US AND TRAIN ONLINE USING OUR VERSATILE APP!

YOU WILL LEARN THE FUNDAMENTALS OF MOVEMENT AND HOW TO EXERCISE SMART.

PROGRAMS THOUGHTFULLY PUT TOGETHER BY A PHYSIOTHERAPIST QUALIFIED PERSONAL TRAINER.

GETTING YOU ON THE ROAD TO FITNESS SAFELY AND EFFECTIVELY!

NO. 3 OF OUR TOP 4 AB EXERCISES: STIR THE POT OR A FITBALL PLANK REGRESSION

Want to train your ABS in an efficient, functional way?

As mentioned in the previous Sit-up posts, you all know (unlike most personal trainers), I am no fan of traditional sit-ups. So here is the third of 4 alternatives that will hit your abs hard and give you that burn that you probably desire. As well as increase the function of your core area if done correctly.

No. 3 in our top 4 ab exercises

3. STIR THE POT:
This is a killer exercise for your abs and core! 
Find a fitball, assume the plank position with a wide stance at the feet to begin with as this will be more manageable at first. Elbows on the ball but aim them to be just underneath the shoulders and about shoulder width apart.
SQUEEZE your gluts, PUSH your elbows into the ball to lift your body away from it. Make sure your butt isn't sticking in the air or lagging towards the ground (think good plank position).

If this is challenging enough then just start with a plank hold and work your way up to achieving 60seconds. Once this is manageable only then attempt the STIR THE POT.

Now you are ready to begin...whilst maintaining as close to zero movement through your torso as possible, gently make small circles with your elbows. Aim for around 6-8reps one way and then repeat the other way. You can then build on the reps as you get stronger or go for time instead. 

This is a great exercise for training your abdominal region to stabilise your pelvis and lower back. If you find your pelvis is rotating with this exercise and you are struggling to control it then maybe go back to the pallof press for a while as it may be a sign that your obliques are not in good working order.

Give it a go and let me know what you think.


LEARN HOW TO TRAIN SMART!

JOIN US AND TRAIN ONLINE USING OUR VERSATILE APP!

YOU WILL LEARN THE FUNDAMENTALS OF MOVEMENT AND HOW TO EXERCISE SMART.

PROGRAMS THOUGHTFULLY PUT TOGETHER BY A PHYSIOTHERAPIST QUALIFIED PERSONAL TRAINER.

GETTING YOU ON THE ROAD TO FITNESS SAFELY AND EFFECTIVELY!

NO. 2 OF OUR TOP 4 AB EXERCISES: FITBALL ROLLOUT OR TRX ROLLOUT

Fitball and TRX rollout exercise. A great way to functionally train your abs and improve core stability!

Want to train your ABS in an efficient, functional way?

As mentioned in the previous Sit-up post, you all know (unlike most personal trainers), I am no fan of traditional sit-ups. So here is the second of 4 alternatives that will hit your abs hard and give you that burn that you probably desire. As well as increase the function of your core area if done correctly.

No. 2 in our top 4 ab exercises

2. ROLLOUTS:

A great way to train your abdominals and work on core stability.

Using either a fitball or a TRX, kneel down, if using a fitball then place your hands on the ball about a foot or two in front of you. If using a TRX then grip the TRX about hip level. Slowly reach out (either rolling the ball out or letting the TRX push forward) whilst locking out your hips (you should feel your gluts & abs engage) so your knees; hips; shoulders are in a straight line. 
Only go as far as you can without feeling any discomfort in your back, if you do, then back off a bit. Don't think you have to rollout all the way, start small and progress. You should be feeling it in your abdominal region. 
Roll out and then back again for 1 rep, see how you go with the reps to determine where to start...don't push it at first though, only do what is comfortable and build on that. I'd suggest holding a good breath on the way out and breathing out as you come back to the start position.

Give it a go! :-)


LEARN HOW TO TRAIN SMART!

JOIN US AND TRAIN ONLINE USING OUR VERSATILE APP!

YOU WILL LEARN THE FUNDAMENTALS OF MOVEMENT AND HOW TO EXERCISE SMART.

PROGRAMS THOUGHTFULLY PUT TOGETHER BY A PHYSIOTHERAPIST QUALIFIED PERSONAL TRAINER.

GETTING YOU ON THE ROAD TO FITNESS SAFELY AND EFFECTIVELY!

1 OF OUR TOP 4 AB EXERCISES: PALLOF PRESS

A great exercise for oblique function!

As promised from our previous post, here is the first of four of our top abdominal exercises that won't harm your lower back.

Want to train your ABS in an efficient, functional way?

As mentioned in the previous Sit-up post, you all know (unlike most personal trainers), I am no fan of traditional sit-ups. So here is the first of 4 alternatives that will hit your abs hard and give you that burn that you probably desire. As well as increase the function of your core area if done correctly.

1. PALLOF PRESS:

This is a killer exercise for the OBLIQUES! 

Kneel down side on to either a light powerband or a cable (I would start with 10kg and go from there, this is harder than it looks!). You only need a small amount of tension if using the Powerband. Keep your hips locked out and hold the cable/powerband level with the bottom of your sternum. As you breathe out, extend the arms and lockout the elbows. The band/cable will want to pull you across to the attachment, the aim is to not let it, make sure you don't hold your breath or flex the hips, if you do then back off the band a bit or lower the weight.

Once this is manageable then try hold the arms out for a count of 5 seconds whilst still breathing.


LEARN HOW TO TRAIN SMART!

JOIN US AND TRAIN ONLINE USING OUR VERSATILE APP!

YOU WILL LEARN THE FUNDAMENTALS OF MOVEMENT AND HOW TO EXERCISE SMART.

PROGRAMS THOUGHTFULLY PUT TOGETHER BY A PHYSIOTHERAPIST QUALIFIED PERSONAL TRAINER.

GETTING YOU ON THE ROAD TO FITNESS SAFELY AND EFFECTIVELY!