BLOG
PLANTAR FASCIA TENSION RELEASE - BRINGING RELIEF TO THE SUPERFICIAL BACK LINE
Plantarfascia release exercise for bottom of feet. Also helpful to release tension in calves & hamstrings.
How happy are your feet & superficial back line?
The Superficial Back Line is a fascial line that connects your scalp; neck extensors; back extensors; hamstrings; calves; achilles and fascia under the foot. This line of fascia (connective tissue) commonly holds tension in a lot of people, particularly if you have suffered back problems or have had abdominal surgery. If you are someone who finds they grip their toes a lot; who has to stand all day for work or suffers from achey feet, you should benefit from this release exercise.
Not only does releasing the tension underneath your foot help with foot cramps; achilles tendinopathy and Plantar Fasciitis. It can have a positive impact further up the chain into the calves / hamstrings / erector spinae (back extension muscles) / neck extensors.
Using a golf ball; posture pro or spikey ball gently place your foot on top and roll forwards and backwards under the foot with as much pressure as you feel comfortable. Spend at least 2-3mins doing this either standing or seated.
You could even do a before and after test, bend forward to touch your toes and see how far you get, spend 2-3mins releasing each foot and retest - you should get further!
Give it a go...!
TIGHT SHOULDERS & LOWER BACK?
How to stretch your lats & lower back effectively. Don't stand for back pain, get assessed at Adelaide's best rehab gym.
Start Position:
Reach forwards and grab onto a pole / rings / TRX / door handle, sit back with your arm outstretched...
Finish Position:
Pop your hips away from the side of your outstretched arm, you should feel a stretch from the top of your pelvis to your armpit.
Here is a great stretch to target both your lats & your lower back muscles. As we know, the lats blend into our Thoracolumbar fascia (thick connective tissue at lower back region) which is often where a lot of tension is stored. Of course, it is always better to get assessed and know WHY you have tension in the first place. At moov pt we assess pain by doing a full body assessment in order to find the real cause of the pain and not just treat the site of pain. We will guide your rehabilitation to move you out of pain using gentle exercises and techniques. Getting you results you never thought possible.
ROLLING PATTERNS FOR ROTATION
Rolling is a fundamental movement we all learned how to do during neurodevelopment, it is the second milestone in neurodevelopment after head control. Rolling combines the use of the upper extremities, core, and lower extremities in a coordinated manner to move from one posture to another. This is done from prone (face down) to supine (face up) and supine to prone.
Rolling is commonly utilised in neurological rehabilitation but is just as important and effective in any rehabilitation programme, particularly for those who have dysfunction in rotational movements or who play rotational dominant sports. It can be used as an assessment and it is also the corrective. There are several cues to help improve someone's rolling pattern and also regressions available.
It is a great method to assess for and correct inefficient movements that involve rotation of the trunk and body; weight shifting in the lower body; and coordinated movements of the head, neck, and upper body.
Upper limb rolling begins with the eyes and head moving in the transverse/rotational plane with the body being taken along for the ride - "where the eyes go the body will follow". Rolling can be done either leading with the upper limb or lower limb, depending on your assessment findings and needs.
WHY YOU'RE EXPERIENCING SHOULDER PAIN & HOW TO IMPROVE IT
In order for your shoulder to function optimally, you need good thoracic (upper back) mobility. Too many people have poor upper thoracic mobility — tightness in the area between your shoulder blades — due to spending many hours at the computer, poor posture, not being active enough, etc. This can lead to problems in shoulder joints, rotator cuff issues and bursitis
We all need good extension through our upper backs in order to complete overhead movements without compromising shoulder joints. In order to improve your upper back mobility, here are a few exercises that can be done at home on a daily basis.
Foam Roller Extension
This will help improve your thoracic mobility into extension. If you're fortunate enough to have a foam roller at home or access to one in the gym, try this...
Sit comfortably with knees bent and bottom on the floor. Place foam roller below shoulder blades, hands behind head.
Keeping your bottom in contact with the floor, slowly breathe out and let your back gently extend over the foam roller. Hold for a count of 3-5 seconds and slowly rise back up to start position.
Repeat this twice and then gently roll the foam roller an inch further up the spine, repeating the extension movement twice. Keep inching the roller up the spine until you've reached the top of your shoulder blades.
Side Lying Thoracic Opener
This will help improve your thoracic mobility into rotation...
Lie on your side with your head supported and bend your knee to 90 degrees before resting it on a foam roller or firm pillow (this protects your lower back). Keep arms outstretched and hands stacked on top of each other.
Start to raise the top hand up and slowly bring it over to the other side of your body, letting your eyes follow that hand all the way, until you can't go further. Make sure your knee stays in contact with the foam roller/pillow and your resting shoulder in contact with the mat, otherwise you've gone too far.
Ensure you can still breathe comfortably and hold for 3-4 breaths, return hand to start position and repeat. Do this 10 times on each side. You'll find that by the last few reps, you'll be able to reach further than the start.
Thoracic Rotation
Only attempt this if you have relatively good shoulder and core strength. This is a good follow on exercise for pain free shoulders that require strength building.
In a standard plank position, make sure your hands are inline with shoulders. Spine (including neck) should be neutral and bum tucked under to engage the glutes, feet just wider than shoulder width apart.
Gently push one hand into the floor, keeping the body aligned and raise the other hand off to rotate around and reach up to the ceiling. Shoulders should be stacked (wrist, shoulder, opposite shoulder and opposite wrist all in one line) and no sagging at the hips.
Your eyes should follow the moving hand at all times. Return to start position and rotate with the opposite arm. Repeat 5-10 times on each side.
Give these a try and let me know how you go!...
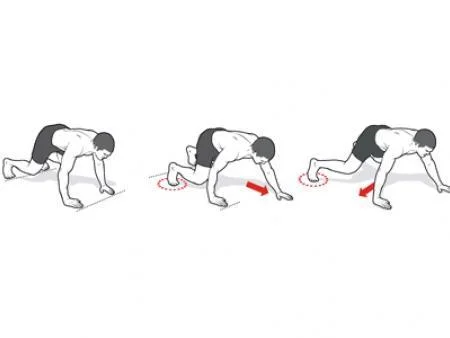
CORE EXERCISE #4: CRAWLING
4th and final core exercise in our top 4...
CRAWLING:
If you are a client of mine you probably just felt a shudder down your spine...the beloved crawling pattern. You either love it or you hate it!
I personally love it as it is an awesome drill for:
- cross-patterning
- co-ordination
- core stability
- core function
- connecting left & right brain
- getting back to basics
- having fun
- mental stimulation
It also follows on nicely from the previous mentioned BIRD DOG drill, the crawling precursor.
The video demonstrates the basic crawling pattern, there are many other versions of crawling. It is a challenge to fight gravity and this is required of us on a daily basis, so why not try this cheeky little drill yourself and see what you think...feel free to comment below and share your thoughts or experiences.
CORE EXERCISE #3 : BIRD DOG
3rd core exercise in our top 4...
BIRD DOG:
Another great core activation drill. Awesome for improving Multifidus function; neck & shoulder stability as well as overall core stability.
For full explanation of the exercise please visit "stability exercises" in our exercise library.
If you found this information (or any info on this page) useful, please share.
CORE EXERCISE #2 : DYING BUG
2nd core exercise in our top Four...
Start the video from 1min 12secs.
DYING BUG:
This is an awesome drill for core activation. The video pretty much says it all. I use this daily with clients and it's a great follow on exercise from the previous breathing drill. Also, don't forget to BREATHE throughout this drill! Exhale as your leg is lowering. Holding your breath is a cheat ;-)
Give it a go :-)
CORE EXERCISE #1 : BREATHING
Four of my top core exercises everyone should make a part of their exercise regime...
First up is...
BREATHING:
The first being BREATHING:
Before you laugh, yes, I did say breathing!
Simple right? Not really. Most of us (myself being a culprit at times) are dysfunctional breathers, this being due to stress; injury; emotional issues; poor health etc. We breathe around 20,000+ breaths per day, that is a lot of opportunity for dysfunction.
We use our core muscles for breathing; simplified our diaphragm & pelvic floor contract together on the inhale to create Intra Abdominal Pressure (IAP), this stabilises our spine & we recruit our remaining core muscles on the exhale.
The dysfunction comes in when we either hold in our stomachs for long periods (females being biggest culprits) or start taking shallower breaths. This makes it extremely hard for normal functional breathing and requires us to recruit our neck and chest muscles with every breath.
To learn how to work on your breathing keep reading. I would highly recommend ANYONE with lower back pain to focus on their breathing especially but really EVERYONE should be doing it...
Visit our exercise library and have a read through our Stability Exercises the first 3 exercises that come up which are about BREATHING.
PRONATION IS NOT THE ENEMY
So many of my clients have issues with being able to pronate (flat arch) their feet, either one foot or both feet. This is usually due to the misconception that pronation is BAD. Pronation is NOT bad, as long as you are able to control the pronation and move from supination (high arch) to pronation and back to supination. The problem comes when you are STUCK in either pronation or supination. Then there is work to be done.
Often the problem of being stuck in pronation results in being given orthotics to wear. The problem I have with this is that now instead of being STUCK in pronation, you will be STUCK in supination due to the orthotics, neither which are useful to you.
The best way to deal with feet that are STUCK is to reconnect with them and put them through the ranges they were designed to achieve, slowly reminding the brain that it can access these ranges of movement.
The inability to pronate or supinate can have massive negative effects further up the kinetic chain. You definitely want to get assessed and make sure your feet are propelling you through life and not slowing you down!
JUST MONKEYING AROUND
Here is a modified hanging version where your feet are on the ground. If you have the strength to do it from a bar with feet off ground, go for that version.
Hanging is a great way to achieve healthy shoulders, I've noticed a massive improvement in my own shoulder/neck region where I have a history of injury. Over the past few months I have incorporated a mixture of passive; active and dynamic hanging into my training along with spending a lot more time on the rings working pullups; front & back lever regressions and lat activations. Not only has my once often rigid neck/shoulder region softened up but my grip strength has become symmetrical and increased in strength. My grip strength used to be about 36kg on my Right and 32kg on my Left (side of old injury and non-dominant side) and now is an equal 40kg each side.
You don't always have to do endless amounts of traditional external and internal rotator resisted exercises to achieve strong shoulders...in fact, if this is all you are doing you may need to find yourself another practitioner. Your shoulders need to be ready for life and in life we move in many ways and put our shoulders under all sorts of stresses and loads. You need to ensure you have optimum mobility and back this up with a good foundation of reactive stability in order to keep your shoulders healthy in the long term.
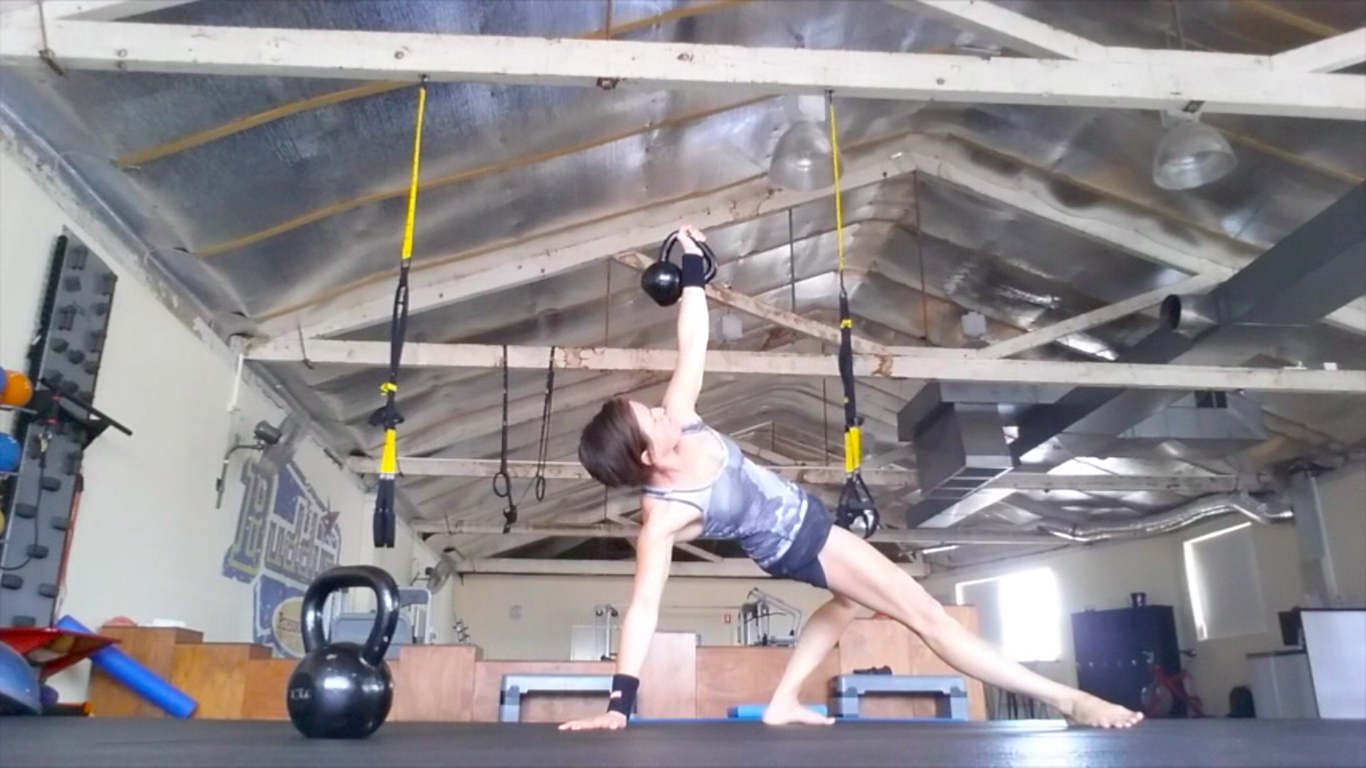
My training has also included plenty handstand practice (working my line against the wall); Turkish Get Ups - these too have improved massively, 6 months ago 8kg was the max I felt comfortable with on my Left and now I am an equal 14kg for at least 1-2reps comfortably and the Left feels just as strong as the RIght. Various other cable & kettlebell stabilisation and strength exercises have also formed part of my training.
For a more in depth read about hanging click on this link to Ido Portal's blog on hanging.
Of course, if you have a shoulder injury or have limitations in your shoulders please get assessed first before jumping into anything new.
Sweet Little Things - Healthy Treat Recipes
This great little information packed ebook not only contains a wide variety of 12 different recipes, but also has a stack of information on the truth behind fats; how we need to form good food habits for our kids and the 10 essential ingredients you need to keep in your cupboard to always have a healthy treat option available to you.
GET YOUR DOWNLOADABLE 6 WEEK LIFESTYLE GUIDE EBOOK. ALL YOU NEED TO GET YOU BACK ON TRACK!
ABOUT MARY
Mary is a qualified Physiotherapist & Personal Trainer who loves movement and helping others get stronger & find confidence in their bodies.
She hit Menopause at the age of 41 and struggled through the fight of Perimenopause, coming out the other side with a wealth of knowledge and a strategy for strength training that works and keeps her & her clients consistent.
She has many qualifications under her belt and focuses on helping others improve their strength; fitness and core function in a safe, guided & supported way.
Don't miss out on free, useful information available on our social networks below. I'd love to see you there!
Check out our Instagram Feed…
RECENT BLOGS
BLOG CATEGORIES